Tuesday, 19 March 2013
The level so far...
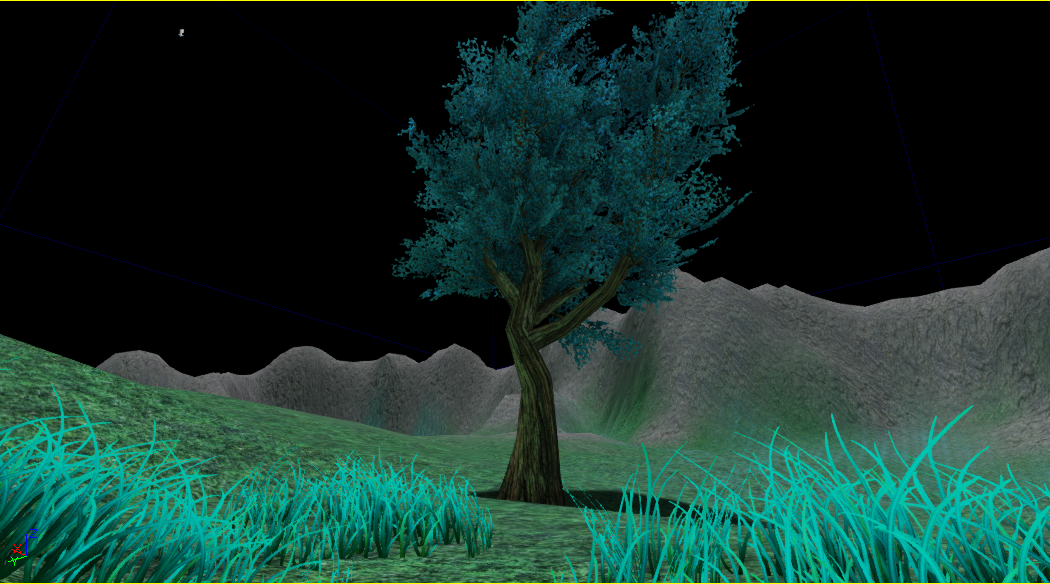
Here is a video of the level so far. I have been playing around with the height fog actor, and I have also added in some ground fog. I need to remove the gun and the interface at some point, I know there's a way to do this within kismet.
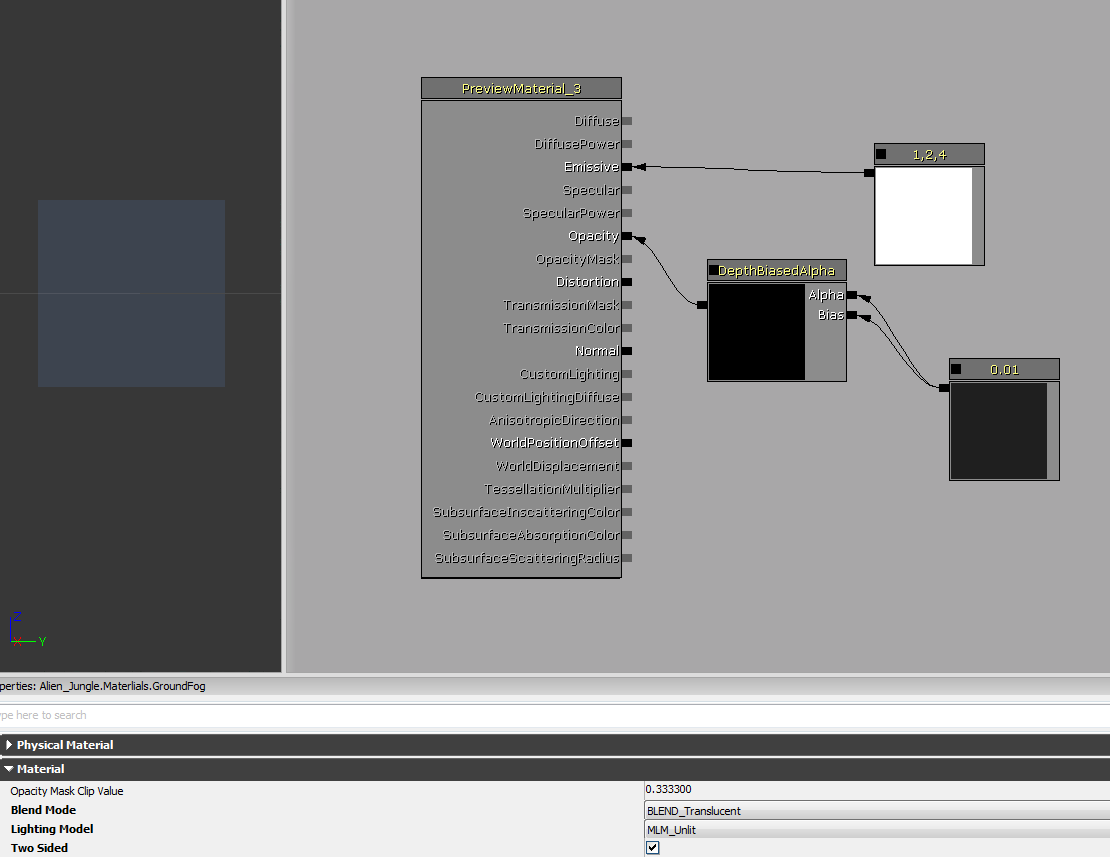
Here are the settings for the fog material at the moment. I think I'll try to implement a moving cloud texture to give the fog more life. I like how it wraps around the plants and grass. I have placed several of these fog planes in any areas that are in shade and also lower down in the level, where I think fog/mist will naturally accumulate.
At the moment it is just static and I'm still tweaking the settings. It would be interesting if I could hide some creatures within it. Once I have the leaves and grass moving, I will need to add in the sounds of the wind in the level, it should definitely give it a whole new dynamic feel.
Don't forget to water the plants!
Continued on with the large yellow plant I concepted. I used the branch tool learned earlier in the project to create the roots here. I then pelt unwrapped them to get the texture to flow correctly. It would be interesting to have the roots move, so I'll keep that in mind as something to go back to, rigging the roots etc.
Here it is in the level, I played around with the material, and increased the specular map to give a better glossy effect.
Then started modelling and texturing the other two plants I had in the last concept. The red one is designed to catch insects crawling along the ground. I think this one can also do with some increased specularity. I used planes for the root like parts, as modelling each small tentacle would be wasteful of triangles.
Creating the blue plant. I've found that I am able to make the planes and alphas for the plants a lot quicker now, almost second nature. I'm definitely benefiting from those first tutorials I followed. Since these are bigger, I think they should probably have a foliage interaction actor, so that they move when you walk into them.
Blue plant in the level, but oops, missing the fur type grass below the heads... possibly missed out one of the material IDs, need to re-add that in UDK.
Also made a simple bush/shrub mesh from the original tree branches, I'll use this to help populate the ground level. It should also still have the vertex painting which will be used when I set up the wind effects. So once the trees are moving, the bush mesh should also move the same way. I really wanted to add in a planet visible through the atmosphere. It took a while for me to think of a way to do this. I thought that adding it to the actual skybox would create a very distorted planet. So I decided that I would make it a static mesh and use an alpha channel to mask out the areas unneeded and where it fades from view. So I painted the planet in photoshop, it took a few attempts to properly fade out the alpha channel to match with the actual planet.
Also took a while to figure out how to make the planet show up correctly in UDK. Originally it wouldn't accept the fading in the alpha channel, it was showing either full opacity or none. I played around with the material settings until I got what I wanted. At the moment it is a very simple material, I'll do some more research to see if I can improve on it.
I then added the water to my level. I looked at several tutorials and checked some packages that someone had made so I could see the structure of their shader/material of their water. It was hard to find one that worked for me, since every place I looked seemed to have a different way of making water, so I have a blend of several. I was quite surprised with how it turned out.
Currently though there is a slight problem with the water. I have added a water volume so you can swim in it, as well as a post process volume that makes it blurry under the surface, but as soon as I touch the water or shoot it, a strange pale sheen appears over it. I don't know what's causing it, possibly something to do with the reflection actor, so I'm going to have to play around with the settings to see if that can be fixed.
Thursday, 7 March 2013
More Developments. Skydome, plants and new tree.
I've now added the grass throughout the level using the foliage editor in UDK. I was able to paint in the 3 grass clump meshes and played around with the settings. I liked how it looked when the density was set really high, but I knew that this would be a problem with resources and I didn't want to push the level too far, since there's a lot more things to be added yet.
Originally it was too high when I played through the level, so I made changes to it so it was more waist height than head height.
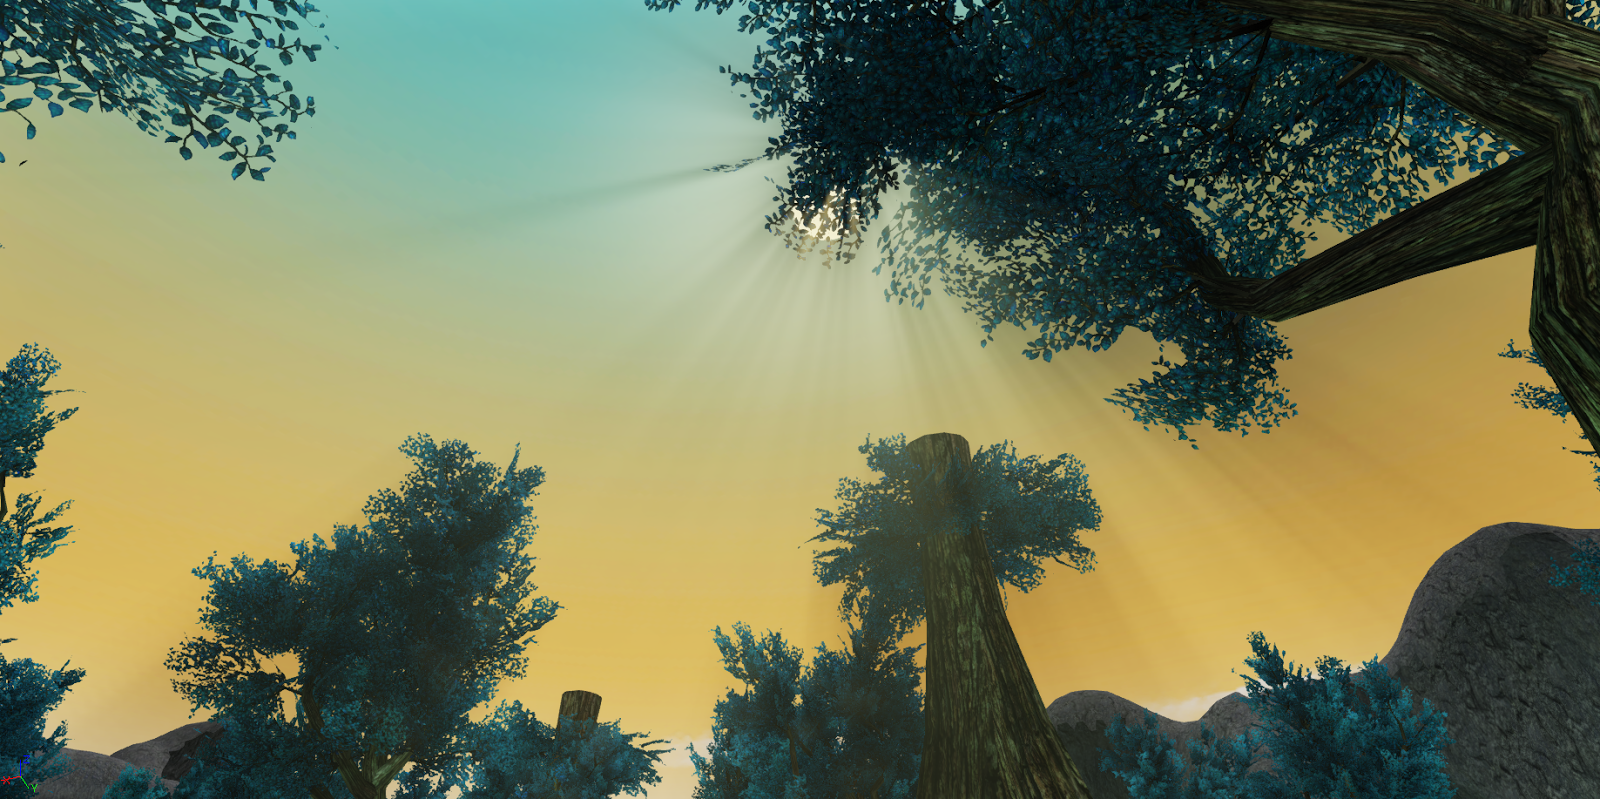
I have now painted a sky dome texture and set it all up in the level. I might edit the position of the colours later, as I haven't decided yet if the orange/yellow colour is too high or too low yet. I really do like the way the suns rays shine through the trees.
I also added all the rocks to the level and spread them out, changing their scale and rotation. I love the way light mass has reflected the colours of the grass onto the rocks, I think it gives a really eerie and alien effect.
This was the set up for the sky dome material. I followed a tutorial for adding the sun. I may move the sun/directional light lower, but the lower the angle the more shadows produced on the surrounding mountains, and some of them look unnatural. So I may have to edit some of the terrain or position the sun at a slight different angle in the sky.
These are some sketches of plant designs that would be within the level. These would be vary between shrub and fern size.
Concepts of the previous plants. I wanted to add some variation of colour in the level rather than have everything a shade of blue. These would create points of interest, and perhaps serve the purpose of leading the player around the area.
This is the progress so far of the large plant, I'll be making the roots next using the branch tool I learned earlier.
These are some tree ideas. I have built the first one sketched and added it to the level. The second one that has glowing blue veins visible that run through its core will be the next one I make. I'll be using an emissive map to get the glowing effects.
This tree was made using the same textures as the first one, but with a differently shaped trunk. Changing only the trunk shape meant that I could put in a new species of tree very quickly.
Originally it was too high when I played through the level, so I made changes to it so it was more waist height than head height.
I have now painted a sky dome texture and set it all up in the level. I might edit the position of the colours later, as I haven't decided yet if the orange/yellow colour is too high or too low yet. I really do like the way the suns rays shine through the trees.
I also added all the rocks to the level and spread them out, changing their scale and rotation. I love the way light mass has reflected the colours of the grass onto the rocks, I think it gives a really eerie and alien effect.
This was the set up for the sky dome material. I followed a tutorial for adding the sun. I may move the sun/directional light lower, but the lower the angle the more shadows produced on the surrounding mountains, and some of them look unnatural. So I may have to edit some of the terrain or position the sun at a slight different angle in the sky.
These are some sketches of plant designs that would be within the level. These would be vary between shrub and fern size.
Concepts of the previous plants. I wanted to add some variation of colour in the level rather than have everything a shade of blue. These would create points of interest, and perhaps serve the purpose of leading the player around the area.
This is the progress so far of the large plant, I'll be making the roots next using the branch tool I learned earlier.
These are some tree ideas. I have built the first one sketched and added it to the level. The second one that has glowing blue veins visible that run through its core will be the next one I make. I'll be using an emissive map to get the glowing effects.
Friday, 1 March 2013
Arranging and testing! Rock creation
This is a small entry just to show how I was starting to add the grass and tree to the level.
I followed the tutorial which showed how to make a master foliage material where I could tweak every detail of the textures, the contrasts and alphas, as well as the hue of all the maps related to the tree foliage and grass. The material has an extensive array of nodes, and I'm playing around with all of the settings to see the interesting effects.
Realised that there's a problem with my light maps, so I'm going to be editing those to get the correct shadows and then reimport the model.
Also made some high poly boulders that I'll place randomly around the cliffs and certain parts of the level. Going to bake them down onto some low poly versions next. I made these by starting off with basic box shapes that I pushed into the shape I wanted each rock to have. I then used the noise, displace and mesh smooth modifiers several times to get the interesting effects.
Definitely need to make the skydome at this point, you can see that it would really help with this shot here, and also show me how the colours of the grass and trees will look against an actual sky.
I followed the tutorial which showed how to make a master foliage material where I could tweak every detail of the textures, the contrasts and alphas, as well as the hue of all the maps related to the tree foliage and grass. The material has an extensive array of nodes, and I'm playing around with all of the settings to see the interesting effects.
Realised that there's a problem with my light maps, so I'm going to be editing those to get the correct shadows and then reimport the model.
Also made some high poly boulders that I'll place randomly around the cliffs and certain parts of the level. Going to bake them down onto some low poly versions next. I made these by starting off with basic box shapes that I pushed into the shape I wanted each rock to have. I then used the noise, displace and mesh smooth modifiers several times to get the interesting effects.
Definitely need to make the skydome at this point, you can see that it would really help with this shot here, and also show me how the colours of the grass and trees will look against an actual sky.
Thursday, 28 February 2013
Trees!
Now I continued on with the tree making. I wanted to create a basic tree first, following the tutorial, and then I would use what I learned to make variations and different species of trees.
First off was making high poly branches. Here I learnt how to use the branch tool in the graphite modelling tools. I was really impressed with this and really got into creating the branches and twigs.
Then created a high poly leaf. I looked at some of the stripy patterns of some of the plants I saw when I went to the botanical gardens. So I painted the diffuse based on those, of course keeping my colour scheme.
I also learned how to utilise the object paint tool to arrange the versions of my leaves all along the branch. Again this would have took an extremely long time without such a simple yet powerful modifier. And creating it all this way makes for more natural looking textures when they are baked from actual 3D objects.
Eventually ended up with two different looking branches, and then all their materials were baked out the same way as the grass previously.
Created the same kind of planes for the branches and then got straight into modelling the tree. I had modelled trees before using the spline and NGon extruding technique, and I found this really helpful. But I also learned a few new ways of creating a tree. Using the path deform modifier I was able to edit the tree very quickly using the splines. The same goes for when adding the branches. This also taught me the value of instances!
Once all the branches were done, I then arranged the leaf planes to a smaller branch, and had two variations of them. These were then added to the main branches with the path constraint tool, which allowed them to snap to the spline within the branch, and it would always stay in this way thanks to the pivot point arrangements. With this I quickly filled out the foliage of the tree.
And finally the finished tree! I had to manually edit the normals to get a better shading.
First off was making high poly branches. Here I learnt how to use the branch tool in the graphite modelling tools. I was really impressed with this and really got into creating the branches and twigs.
Then created a high poly leaf. I looked at some of the stripy patterns of some of the plants I saw when I went to the botanical gardens. So I painted the diffuse based on those, of course keeping my colour scheme.
I also learned how to utilise the object paint tool to arrange the versions of my leaves all along the branch. Again this would have took an extremely long time without such a simple yet powerful modifier. And creating it all this way makes for more natural looking textures when they are baked from actual 3D objects.
Eventually ended up with two different looking branches, and then all their materials were baked out the same way as the grass previously.
Created the same kind of planes for the branches and then got straight into modelling the tree. I had modelled trees before using the spline and NGon extruding technique, and I found this really helpful. But I also learned a few new ways of creating a tree. Using the path deform modifier I was able to edit the tree very quickly using the splines. The same goes for when adding the branches. This also taught me the value of instances!
And finally the finished tree! I had to manually edit the normals to get a better shading.
Making the Grass
I followed some tutorials for the grass. I made high poly versions of each blade, and then grouped them together against a plane to make chunks of grass. I learned how to use the FFD modifier to edit the mesh in a smooth and flowing way, this will come in handy for the other plants I have planned to make.
I then created a series of materials to be baked out as a texture for the grass, there was the base diffuse, different highlights, colour variation between the blades.I really like the aqua/turquoise colours in the grass. I think they will look really great once spread out in my level in UDK.
After all the baking, I'm now a lot more confident in using it and so much quicker in doing so.
Then created separate planes and alphas. All the materials that were baked out were combined and masked in photoshop to enhance the whole texture overall. I had some problems with a grey line around the edges of the grass blades, but I played around with the settings in the material editor for a while until they finally went away. I took screenshots of the settings to make sure that doesn't happen again as it really interrupted my work flow!
Also learned how to use the bend modifier properly to get the planes looking more interesting from all angles.
Then arranged all the plains in different sized patches, these are to be used in the level throughout.
I then created a series of materials to be baked out as a texture for the grass, there was the base diffuse, different highlights, colour variation between the blades.I really like the aqua/turquoise colours in the grass. I think they will look really great once spread out in my level in UDK.
After all the baking, I'm now a lot more confident in using it and so much quicker in doing so.
Then created separate planes and alphas. All the materials that were baked out were combined and masked in photoshop to enhance the whole texture overall. I had some problems with a grey line around the edges of the grass blades, but I played around with the settings in the material editor for a while until they finally went away. I took screenshots of the settings to make sure that doesn't happen again as it really interrupted my work flow!
Also learned how to use the bend modifier properly to get the planes looking more interesting from all angles.
Then arranged all the plains in different sized patches, these are to be used in the level throughout.
Terrain Creation!
I had a pretty good idea of how I wanted the level to look, so I did a quick birds eye view of the layout. The pencil sketch shows the basic features and shape of the level. I also want the tree's canopy layer to cover a lot of the sky so its more jungle like, so I placed circles that merged together to show this effect. The cross at the bottom shows the player start.
I decided to use the terrain editor in UDK for the base of my level. I created a large plane and started using the brushes to create the terrain I wanted. I found that the brushes were intuitive and I had a lot of fun shaping the landscape. I did have some worries about how to block in the player though. I didnt want to have perfectly straight up mountains perfectly enclosing the area. And one thing that always bugged me in games was invisible barriers! I hated the feeling of being trapped unfairly when I can see more land and things to look at in the distance. I think invisible collision walls are definitely a big way of damaging the player's immersion in the game.
So I tried to make the mountains seem more natural and created varying depths and made some encroach on the area.
I also made two rock textures and two ground textures. I found out though that the tiling is really obvious on such a large area.
I made some tweaks to them, going back and forth between photoshop. Eventually I realised that once all the trees and plants and rocks are in the level, it would greatly decrease your line of sight. When I played on the level, the ground in front of me looked perfectly fine, and since jungles are so dense, you wouldn't be able to see the tiling on the ground or even the mountains.
I'm keeping with the bluey/green theme in my level, so there's patches of blue moss on the ground throughout.
I'm adding more detail to the terrain now, added the ramp formation that leads to a ledge, and also a deep area for the pool and waterfall that will go in the top right, and another depression for a smaller pond. Also painted the terrain textures to correspond with this geometry.
I did encounter one problem when I suddenly got really harsh shadows on certain parts of the level mesh. After some searching as well as checking the settings in the single dominant directional light, I found that I had accidentally duplicated the terrain. This is easily done when painting terrain, textures and panning your view since you're having to hit so many keys.
I decided to use the terrain editor in UDK for the base of my level. I created a large plane and started using the brushes to create the terrain I wanted. I found that the brushes were intuitive and I had a lot of fun shaping the landscape. I did have some worries about how to block in the player though. I didnt want to have perfectly straight up mountains perfectly enclosing the area. And one thing that always bugged me in games was invisible barriers! I hated the feeling of being trapped unfairly when I can see more land and things to look at in the distance. I think invisible collision walls are definitely a big way of damaging the player's immersion in the game.
So I tried to make the mountains seem more natural and created varying depths and made some encroach on the area.
I made some tweaks to them, going back and forth between photoshop. Eventually I realised that once all the trees and plants and rocks are in the level, it would greatly decrease your line of sight. When I played on the level, the ground in front of me looked perfectly fine, and since jungles are so dense, you wouldn't be able to see the tiling on the ground or even the mountains.
I'm keeping with the bluey/green theme in my level, so there's patches of blue moss on the ground throughout.
I'm adding more detail to the terrain now, added the ramp formation that leads to a ledge, and also a deep area for the pool and waterfall that will go in the top right, and another depression for a smaller pond. Also painted the terrain textures to correspond with this geometry.
I did encounter one problem when I suddenly got really harsh shadows on certain parts of the level mesh. After some searching as well as checking the settings in the single dominant directional light, I found that I had accidentally duplicated the terrain. This is easily done when painting terrain, textures and panning your view since you're having to hit so many keys.
Subscribe to:
Posts (Atom)