Continued on with the large yellow plant I concepted. I used the branch tool learned earlier in the project to create the roots here. I then pelt unwrapped them to get the texture to flow correctly. It would be interesting to have the roots move, so I'll keep that in mind as something to go back to, rigging the roots etc.
Here it is in the level, I played around with the material, and increased the specular map to give a better glossy effect.
Then started modelling and texturing the other two plants I had in the last concept. The red one is designed to catch insects crawling along the ground. I think this one can also do with some increased specularity. I used planes for the root like parts, as modelling each small tentacle would be wasteful of triangles.
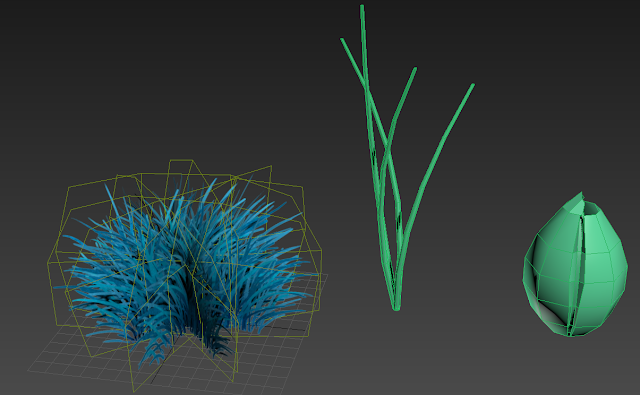
Creating the blue plant. I've found that I am able to make the planes and alphas for the plants a lot quicker now, almost second nature. I'm definitely benefiting from those first tutorials I followed. Since these are bigger, I think they should probably have a foliage interaction actor, so that they move when you walk into them.
Blue plant in the level, but oops, missing the fur type grass below the heads... possibly missed out one of the material IDs, need to re-add that in UDK.
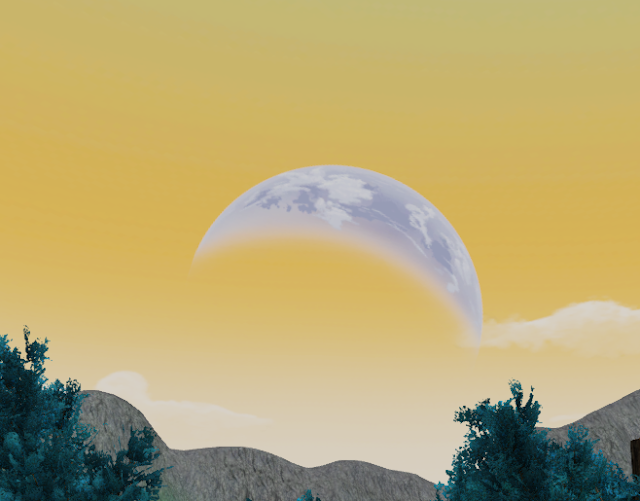
Also made a simple bush/shrub mesh from the original tree branches, I'll use this to help populate the ground level. It should also still have the vertex painting which will be used when I set up the wind effects. So once the trees are moving, the bush mesh should also move the same way. I really wanted to add in a planet visible through the atmosphere. It took a while for me to think of a way to do this. I thought that adding it to the actual skybox would create a very distorted planet. So I decided that I would make it a static mesh and use an alpha channel to mask out the areas unneeded and where it fades from view. So I painted the planet in photoshop, it took a few attempts to properly fade out the alpha channel to match with the actual planet.
Also took a while to figure out how to make the planet show up correctly in UDK. Originally it wouldn't accept the fading in the alpha channel, it was showing either full opacity or none. I played around with the material settings until I got what I wanted. At the moment it is a very simple material, I'll do some more research to see if I can improve on it.
I then added the water to my level. I looked at several tutorials and checked some packages that someone had made so I could see the structure of their shader/material of their water. It was hard to find one that worked for me, since every place I looked seemed to have a different way of making water, so I have a blend of several. I was quite surprised with how it turned out.
Currently though there is a slight problem with the water. I have added a water volume so you can swim in it, as well as a post process volume that makes it blurry under the surface, but as soon as I touch the water or shoot it, a strange pale sheen appears over it. I don't know what's causing it, possibly something to do with the reflection actor, so I'm going to have to play around with the settings to see if that can be fixed.


No comments:
Post a Comment